If you have ever struggled with cakey makeup, visible creases, or patchy coverage, you are not alone. Mastering Easy Concealer Blending Hacks for Beginners can completely change the way your makeup looks and feels. Concealer is one of the most powerful tools in makeup, yet it is often used incorrectly. When blended the right way, it hides dark circles, acne, redness, and fine lines while still looking natural. In this guide, you will learn how to blend concealer for beginners and professionals alike. These expert-approved techniques are simple, effective, and perfect for achieving flawless skin every day.
Why Concealer Blending Matters More Than You Think
Concealer does more than cover imperfections. It shapes your face, brightens dull areas, and gives your skin a polished finish. However, even the best concealer can look bad if it is not blended properly.
Poor blending often leads to:
- Heavy under-eyes
- Patchy coverage
- Creasing and cracking
- Obvious makeup lines
On the other hand, flawless blending creates smooth, skin-like coverage. That is why learning proper concealer blending hacks is essential for both beginners and experienced makeup users.
What Most People Don’t Know About Concealer
Before jumping into techniques, it is important to understand what you are working with.
| Type of Concealer | Coverage Level | Best For | Blending Difficulty |
|---|---|---|---|
| Liquid Concealer | Light to Medium | Under-eyes, beginners, natural finish | Very Easy |
| Cream Concealer | Medium to Full | Acne, dark spots, pigmentation | Moderate |
| Stick Concealer | Full | Spot concealing, precise coverage | Needs Careful Blending |
| Pot Concealer | Full to Very Full | Professional makeup, heavy coverage | Advanced |
Pro Tip:
If you are just starting out, liquid concealer is the easiest option to control and blend, making it perfect for learning basic concealer blending techniques.
How to Blend Concealer for Beginners (Step-by-Step)
If you are new to makeup, this section is for you. These steps will help you master how to blend concealer for beginners without stress.
Step 1: Prep Your Skin First
Always start with clean, moisturized skin. Dry skin causes concealer to crack and settle into lines.
Apply:
- Moisturizer
- Eye cream (for under-eyes)
- Primer (optional but helpful)
Let everything absorb for at least one minute.
Step 2: Use Less Product
One of the biggest beginner mistakes is using too much concealer. Start with small dots. You can always add more, but removing excess is harder.
Step 3: Let the Concealer Sit
Instead of blending immediately, wait 20–30 seconds. This trick allows the concealer to thicken slightly, giving better coverage with less product.
Step 4: Blend Gently
Use light tapping motions. Never drag or rub. Patting helps melt the concealer into your skin for a natural finish.
Easy Concealer Blending Hacks for Beginners
This section is a dedicated guide to Easy Concealer Blending Hacks for Beginners, designed to build confidence and skill quickly.
Hack #1: Use Warm Fingers
Your fingers naturally warm the product, making it blend effortlessly. This works especially well for under-eyes.
Hack #2: Always Blend Outward
Blend from the center of the problem area outward. This keeps coverage where you need it and avoids heavy edges.
Hack #3: Use Damp Tools
A slightly damp sponge prevents product buildup and creates a skin-like finish.
Hack #4: Thin Layers Work Best
Apply concealer in thin layers instead of one thick layer. This prevents creasing and looks more natural.
Easy Concealer Blending Techniques Used by Pros
Professional makeup artists rely on simple but precise methods. These easy concealer blending techniques work for everyone.
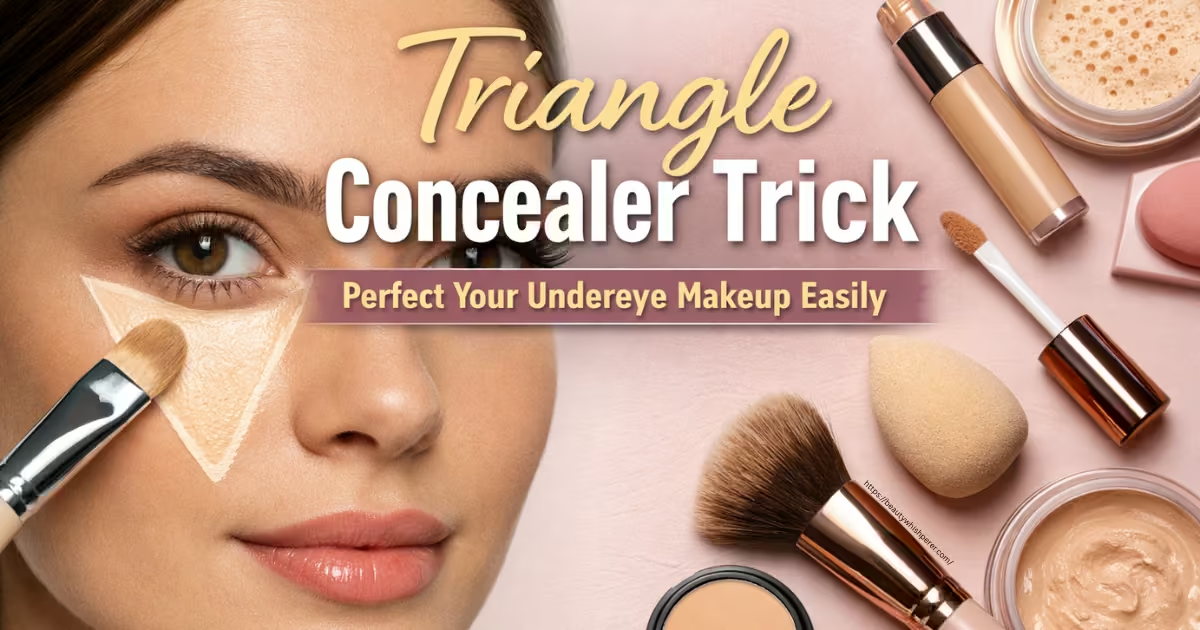
- The Triangle Method for Under-Eyes: Apply concealer in a small upside-down triangle shape under your eyes. Blend downward to lift and brighten the face instantly.
- The Pinpoint Concealing Method: Instead of spreading concealer everywhere, place tiny dots only on blemishes. Blend the edges, not the center.
- The Press, Don’t Swipe Rule: Pros press concealer into the skin rather than swiping. This keeps coverage intact.
Best Tools for Flawless Concealer Application
Choosing the right tool can completely change your results.
Beauty Sponge
- Best for beginners
- Creates natural, airbrushed finish
- Great for under-eyes
Concealer Brush
- Offers precision
- Ideal for acne and pigmentation
Fingers
- Perfect for quick blending
- Best for dry or mature skin
For flawless concealer application, many professionals combine tools—brush first, sponge to finish.
Concealer Tips for Beginners That Make a Big Difference
Small adjustments can completely transform how concealer looks. Choosing the correct shade prevents gray under-eyes or obvious patches. Avoiding heavy powder keeps the skin fresh instead of dry. Setting only where necessary allows the concealer to move naturally with the skin.
Fixing creases immediately instead of layering more product is a professional habit that beginners often overlook. These concealer tips for beginners save time and prevent frustration.
How to Blend Concealer for Different Skin Concerns
- Dark Circles: Apply a peach or orange color corrector before concealer, blending gently to prevent creasing.
- Acne and Blemishes: Apply concealer after foundation. Tap around the blemish, not on top.
- Redness: Use a green color corrector sparingly, then layer concealer on top.
- Fine Lines: Use lightweight concealer and minimal powder to avoid settling.
Common Concealer Blending Mistakes to Avoid
Even pros make mistakes. Avoid these for better results:
- Using too much product
- Blending too aggressively
- Skipping skin prep
- Using the wrong shade
- Over-powdering
Fixing these instantly improves your look.
Flawless Concealer Application for Long-Lasting Wear
If you want concealer that lasts all day, follow this routine:
- Prep skin properly
- Apply thin layers
- Let concealer set slightly
- Blend gently
- Set lightly
This technique ensures flawless concealer application without heaviness.
Advanced Concealer Blending Hacks for Pros
Once you master the basics, try these pro tricks:
- Mix concealer with eye cream for natural finish
- Use setting spray on sponge to blend
- Highlight with concealer instead of foundation
- Use minimal product under harsh lighting
These tricks elevate your makeup instantly.
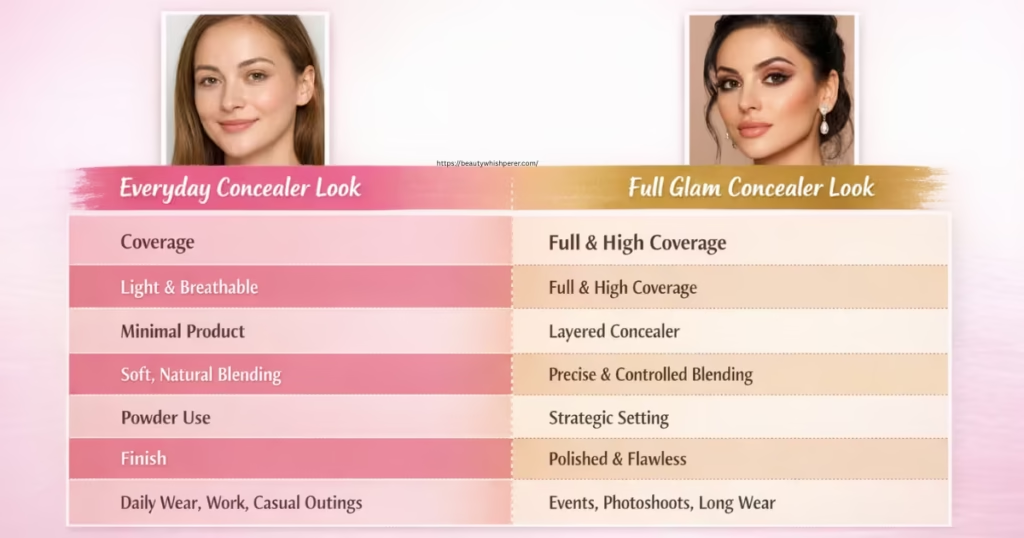
Daily vs Glam Concealer Blending
| Aspect | Everyday Concealer Look | Full Glam Concealer Look |
|---|---|---|
| Coverage | Light and breathable | Full and high coverage |
| Concealer Application | Minimal product | Layered concealer |
| Blending Style | Soft, natural blending | Precise and controlled blending |
| Powder Use | Minimal powder | Strategic setting |
| Finish | Fresh, skin-like | Polished and flawless |
| Best For | Daily wear, work, casual outings | Events, photoshoots, long wear |
Tip:
Understanding the difference between daily and glam concealer blending helps you adjust your routine effortlessly while keeping your skin looking natural and flawless.
Conclusion
Concealer does not have to be complicated. When you understand your skin, use the right tools, and follow expert-approved concealer blending hacks, your makeup instantly looks smoother and more natural. Whether you are learning how to blend concealer for beginners or refining professional skills, the key is patience and practice. Simple techniques always work better than heavy makeup.
Now it is your turn. Try these easy concealer blending techniques in your daily routine and notice the difference. If this guide helped you, share it with a friend, bookmark it for later, and start practicing today. Beautiful, flawless skin is just a few taps away.
FAQ Related to:
How do beginners blend concealer without it looking cakey?
Beginners can avoid cakey concealer by using less product and building coverage slowly. Always start with moisturized skin, especially under the eyes. Apply concealer in small dots and let it sit for a few seconds before blending. Then gently tap it into the skin using a damp sponge or your fingers instead of rubbing. Avoid heavy powder, as too much setting can make concealer look dry and thick.
What is the best way to blend concealer for flawless skin?
The best way to blend concealer for flawless skin is to press and tap, not swipe. Use a sponge, brush, or fingers to gently blend the edges while keeping coverage where needed. Blending outward helps the concealer melt into the skin naturally. Thin layers always look better than one heavy layer, and proper skin prep makes a huge difference.
Should concealer be applied before or after foundation?
Usually, concealer is best applied after foundation. Foundation evens out the skin tone first, so you only need a small amount of concealer for remaining imperfections. This technique looks more natural and prevents heavy buildup. However, for dark circles or discoloration, color corrector and concealer can be applied before foundation if needed.
Which concealer is easiest to blend for beginners?
Liquid concealer is the easiest option for beginners. It has a lightweight texture, spreads smoothly, and blends easily without much effort. Liquid concealers work especially well for under-eyes and everyday makeup. They are forgiving, easy to control, and less likely to look cakey compared to thicker formulas.
How do I stop concealer from creasing under my eyes?
To prevent creasing, always start with hydrated under-eyes using a lightweight eye cream. Use a small amount of concealer and blend it well. Let it set for a few seconds, then lightly tap out any creases before setting with a tiny amount of translucent powder. Avoid over-powdering, as dryness makes creasing worse.
What tools are best for blending concealer—brush, sponge, or fingers?
Each tool works well when used correctly. A damp sponge gives the most natural finish and is great for beginners. Brushes offer precision for acne or dark spots. Fingers are perfect for quick blending and dry skin because body heat helps the concealer melt into the skin. Many professionals use a combination of tools for the best results.